

Table of Contents
- Why a Gallery Wall Works in a Small Rented Flat
- Step 1: Plan Your Layout and Measure Your Wall Space
- Step 2: Damage-Free Hanging Methods for Renters
- Step 3: Gallery Wall Layout Ideas for Small Spaces
- Step 4: How to Mix and Match Art Styles
- Step 5: Sourcing Affordable Art and Digital Prints
- Step 6: Lighting Your Gallery Wall
- Common Mistakes to Avoid
- Frequently Asked Questions
Last Updated: September 1, 2026
Why a Gallery Wall Works in a Small Rented Flat
A gallery wall in a small rented flat transforms blank walls into a curated story without requiring permanent fixtures or damaging your deposit. Unlike traditional art installations, a gallery wall combines multiple pieces at varying scales, creating visual depth and personality in compact spaces where every square centimetre matters.
Renters face a specific challenge: you want your space to feel like home, but you can't drill holes or paint. A gallery wall solves this by using damage-free hanging methods, adhesive strips, lightweight frames, and clever arrangement, that let you create a professional, gallery-quality display that comes down cleanly when you move.
The real advantage goes beyond aesthetics. A well-planned gallery wall for small spaces gives you control over your environment. You choose the art, the layout, the colours, and the story your walls tell. For renters especially, this matters because your flat is temporary, but your taste isn't. You can take your gallery wall with you.
Step 1: Plan Your Layout and Measure Your Wall Space
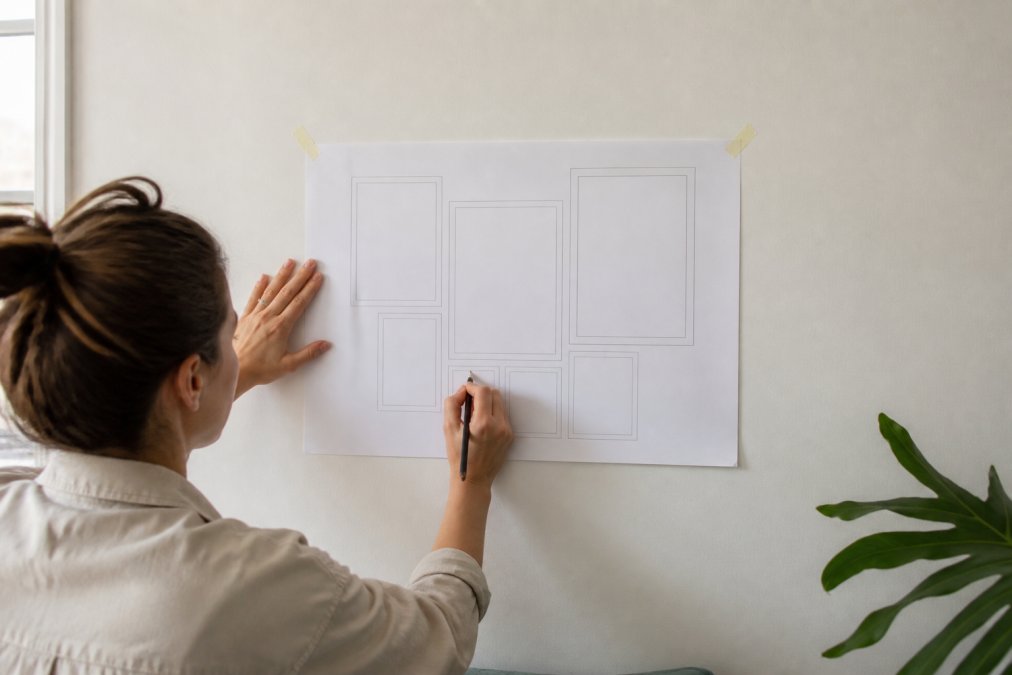
Before you hang a single frame, measure your wall and sketch out your design on paper. This step prevents mistakes that waste time and adhesive strips.
Start by measuring the wall's dimensions in centimetres. Note any obstacles: radiators, light switches, skirting boards, or architectural features. Measure the height where you want your gallery wall to sit. A common guideline is to centre the arrangement at eye level, roughly 150-160 centimetres from the floor to the middle of your gallery wall.
Next, gather your frames and artwork. Lay them out on the floor in the arrangement you're considering. This gives you a real sense of spacing and balance before committing anything to the wall. Take a photograph of this floor layout, you'll refer to it during installation.
Finding Your Hero Piece
Every gallery wall needs a focal point: a hero piece that anchors the arrangement and draws the eye first. This is typically your largest frame, your most colourful artwork, or a personalised portrait that holds emotional weight.
For renters, a hero piece works particularly well when it's something you can take with you and repurpose in future homes. A personalised portrait, whether a family photo, a couple's portrait, or even a pet, becomes that anchor. Thistle and Ink Art's Personalised Photo to Digital Art Portrait (£8.99) transforms your favourite photo into a striking digital artwork you can print at any size. Print it large, A2 or A1, and it becomes the natural centre of your gallery wall.
Position your hero piece first, then arrange smaller pieces around it. This creates visual hierarchy and prevents the wall from feeling chaotic.
Creating Paper Templates
Paper templates are your secret weapon. They eliminate guesswork and make installation faster.
Trace each frame onto kraft paper or newspaper, then cut out the shapes. Label each template with the frame size and artwork title. Tape the templates to your wall in your proposed arrangement, step back, and assess the layout from different angles and distances. This is where you catch spacing issues or composition problems before any adhesive touches the wall.
Once the templates look right, mark the hanging points (where the frame hook or adhesive strip will go) with a pencil. Remove the templates, and you have a roadmap for installation.
Step 2: Damage-Free Hanging Methods for Renters
Damage-free hanging is non-negotiable for renters. Your deposit depends on leaving walls unmarked and unscrathed.
The most reliable method is adhesive strips specifically designed for picture hanging. These strips grip securely without nails, screws, or holes. They release cleanly when you're ready to move, leaving no residue or wall damage if applied correctly.
Adhesive Strips and Weight Limits
Not all adhesive strips are equal. Command Strips and similar products are designed to hold frames safely, but they have strict weight limits. A standard adhesive strip typically holds up to 2-3 kilograms per pair. Before purchasing, check the packaging for the weight rating.
Here's the critical part: weight limits for adhesive strips vary by product and wall type. Smooth, clean walls hold better than textured or freshly painted ones. If your flat has textured walls, your frames will hold less weight, so use heavier-duty strips or reduce the frame weight.
Calculate the total weight of each frame including glass and artwork. A large frame with thick glass can weigh 2-3 kilograms on its own. If your gallery wall includes several heavy frames, you may need to stagger them, don't place all the heavy pieces in one area.
For particularly heavy pieces or if you're nervous about adhesive strips, consider using a picture rail or temporary wall anchors (if your landlord permits). These distribute weight more evenly and are less likely to fail.
Post-Move Wall Repair and Deposit Protection
When you remove adhesive strips, residue sometimes remains. To protect your deposit, remove strips slowly at a 180-degree angle, pulling parallel to the wall rather than outward. If residue persists, use a hairdryer to warm the adhesive slightly, then rub gently with your thumb or a soft cloth.
For any small marks or holes left behind, use a white paint pen or touch-up paint that matches your wall. Most landlords accept minor, repaired marks as normal wear. Document your repairs with photographs before you move out.
Keep your gallery wall simple enough to remove and repair within a day. This peace of mind is worth the extra planning.
Step 3: Gallery Wall Layout Ideas for Small Spaces
Small spaces demand thoughtful arrangement. The layout you choose determines whether your gallery wall feels intentional or cluttered.
Symmetrical Grid vs. Asymmetrical Arrangement
A symmetrical grid layout uses evenly-spaced frames in straight rows and columns. This approach works beautifully in small spaces because it feels organised and controlled. It's also the easiest to plan: measure once, repeat the spacing, and you're done.
An asymmetrical arrangement is more organic and artistic. Frames vary in size, spacing is irregular, and the overall composition is balanced but not uniform. This layout feels curated and personalised, perfect for telling a visual story, but it requires more careful planning to avoid looking haphazard in a compact room.
For a small flat, consider a hybrid approach: use a loose grid as your foundation, then break it with one or two pieces positioned slightly off-grid. This gives you structure without rigidity.
Vertical Space Optimisation for Compact Rooms
In a small flat, think vertical. Extend your gallery wall from roughly 120 centimetres to 200 centimetres high. This draws the eye upward, making the room feel taller and more spacious.
Stack frames vertically in pairs or columns. Alternate tall and narrow frames with wider, shorter ones. This creates visual rhythm and prevents the wall from looking monotonous.
Avoid spreading your gallery wall too wide horizontally. A narrow, tall arrangement works better in a small space than a wide, shallow one. If you have limited wall space, go up rather than across.
Step 4: How to Mix and Match Art Styles
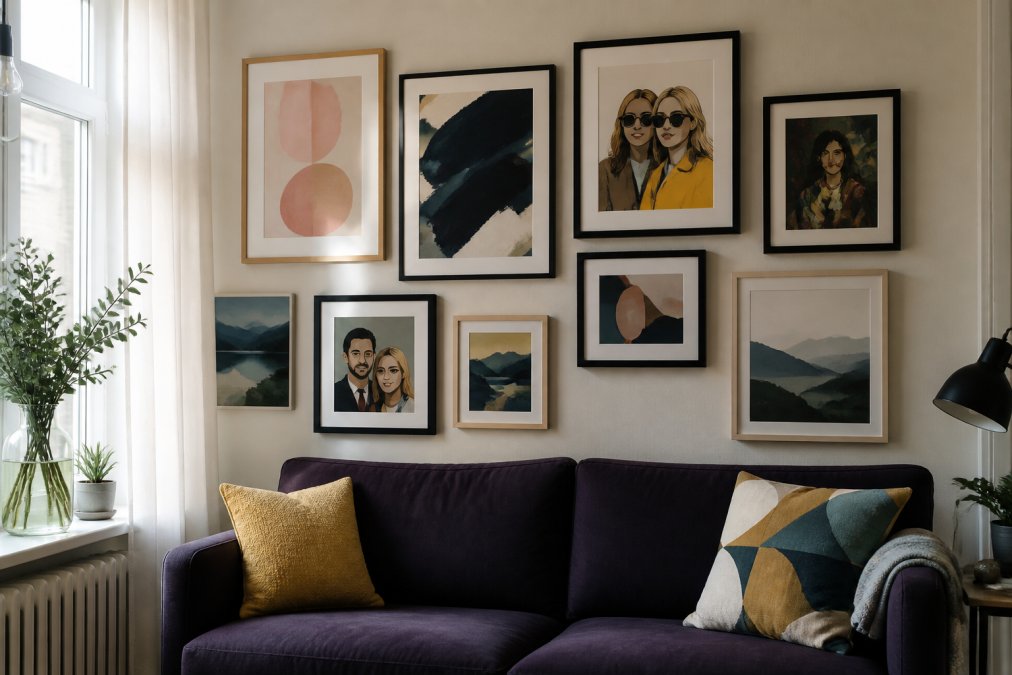
The most visually interesting gallery walls combine different styles, mediums, and aesthetics. The key is creating cohesion so the collection feels intentional rather than random.
Balancing Colour, Texture, and Visual Weight
Colour is your primary tool for unity. Choose a colour palette of 3-4 main colours, then ensure each colour appears at least twice on the wall. This repetition ties the arrangement together.
Visual weight refers to how "heavy" a piece feels. A dark, busy abstract print feels heavier than a light, minimal line drawing. Balance heavy and light pieces across the wall so one side doesn't visually dominate.
Texture adds depth. Mix framed prints, canvas prints, and even small 3D objects like woven wall hangings or small sculptures. Vary the frame finishes too, natural wood, black metal, white painted, and gold accents all work together if your colour palette is consistent.
Combining Frames and Creating Cohesion
Frame choice matters more than people realise. Using the same frame style for every piece creates uniformity, which can feel sterile in a small space. Instead, choose 2-3 complementary frame styles and repeat them throughout the arrangement.
Thistle and Ink Art's collection works beautifully in mixed-frame gallery walls because the artwork itself carries strong visual identity. A personalised portrait from Your Story in Art - Personalised Portrait from Your Photo (£0.00 for the digital download, then print costs apply) pairs naturally with Scottish-inspired prints or abstract designs because the colourful, character-filled style unifies them.
Combine different frame materials: wood frames with metal accents, simple frames with ornate ones. The unifying factor is your colour scheme and the artwork's visual language, not frame uniformity.
Step 5: Sourcing Affordable Art and Digital Prints
Affordable art doesn't mean low quality. Digital prints, when sourced from the right provider and printed on good paper, rival traditional art in appearance and longevity.
Digital art offers flexibility. You can print one copy today and reprint it in a different size or on different paper in future years. You own the file permanently, so you can take your gallery wall anywhere.
Thistle and Ink Art specialises in exactly this: affordable, high-quality digital artwork ready to print. Their Personalised Photo to Digital Art Portrait (£8.99) lets you commission a custom portrait from your photo, then download and print it at home or through a professional print service. For couples, This Is Us - Personalised Couple Portrait (£8.99) creates a vibrant, character-filled artwork celebrating your relationship.
When sourcing prints, prioritise resolution. Ask for files at 300 DPI (dots per inch) for crisp, professional-looking prints. Print on quality paper, matte or satin finishes hide imperfections better than glossy paper, which shows fingerprints and dust.
Budget-friendly sourcing means buying fewer, higher-quality pieces rather than many mediocre ones. A small gallery wall with 5-7 carefully chosen pieces beats a crowded wall of cheap prints.
Step 6: Lighting Your Gallery Wall
Lighting transforms a gallery wall from nice to stunning. Proper illumination highlights texture, colour, and detail that dim lighting hides.
Natural light is ideal, but most flats don't have perfect natural light on every wall. If your gallery wall receives direct sunlight, be aware that prints will fade over time. Consider UV-protective glass or acrylic for valuable pieces, or rotate artwork periodically.
For artificial lighting, picture lights mounted above or below the gallery wall work beautifully. These are small, discreet lights that cast warm illumination across the arrangement without glare. Alternatively, use adjustable LED strip lights behind a floating shelf above the gallery wall, or position a floor lamp at an angle to light the wall.
Avoid harsh overhead lighting or bright spotlights, which create shadows and wash out colours. Warm-toned lighting (2700-3000K colour temperature) complements most artwork and creates an inviting atmosphere in a small flat (IES Lighting Definitions).
Common Mistakes to Avoid
The most frequent error is poor spacing. Frames bunched too tightly feel cramped; gaps that are too wide make the arrangement feel disconnected. Aim for consistent spacing of 5-8 centimetres between frames, then vary it slightly for visual interest.
Another mistake is ignoring the wall's existing features. A gallery wall that accounts for windows, doors, and architectural details feels intentional. One that ignores them looks like you didn't plan.
Hanging everything at the same height creates monotony. Vary the vertical position of frames, some higher, some lower, to create rhythm and draw the eye across the wall.
Finally, don't overthink it. A gallery wall is not permanent. If your arrangement doesn't work, you can rearrange it. Use this to your advantage. Start with your best guess, live with it for a week, then adjust based on how it actually feels in your space.
Creating a meaningful, character-filled gallery wall in a small rented flat is entirely achievable, and it doesn't require permanent damage or sacrificing your deposit. The key is planning carefully, choosing damage-free hanging methods, and sourcing artwork that reflects your personality. Thistle and Ink Art makes this easier by offering affordable, high-quality digital artwork you can print and display immediately. Whether you're hanging personalised portraits, Scottish-inspired prints, or abstract designs, a well-planned gallery wall transforms your temporary flat into a home that tells your story. Start with your hero piece, use paper templates to plan your layout, and build from there. Your walls deserve to reflect who you are.
Frequently Asked Questions
How do I hang a gallery wall without damaging rental walls?
Use adhesive strips specifically designed for renters, such as command strips, which hold frames securely without leaving marks. Always check weight limits before hanging, most rental-safe adhesive strips support 0.5-2 kg per strip depending on the brand. Test one strip on a hidden area first. When you move, remove strips slowly at a 180-degree angle, and use a hairdryer on low heat to soften any residue before gently rubbing it away. Keep the original wall documentation in case your landlord requires proof of damage-free removal.
Can I use digital art prints for a gallery wall in a small rented flat?
Yes. Digital art prints are ideal for renters because they're affordable, instantly downloadable, and easy to frame and rehang. Print them at home or at a local print shop on standard paper or canvas, then use inexpensive frames from high street retailers. Personalised digital portraits, like those from Thistle and Ink Art (from £8.99), let you create a character-filled gallery wall that reflects your story without the cost of commissioned art or permanent installation.
What layout works best for a gallery wall in a small space?
Start with a hero piece, your largest or most striking artwork, as the anchor. Arrange smaller pieces around it using either a symmetrical grid (formal, organised) or an asymmetrical layout (eclectic, dynamic). Measure your wall space carefully and use paper templates to test positions before hanging anything. For small flats, vertical arrangements maximise wall space without overwhelming the room. Leave consistent spacing between frames (5-10 cm is standard) to create visual balance and avoid a cluttered feel.
How do I mix different art styles in one gallery wall without it looking chaotic?
Tie disparate pieces together through colour, frame style, or theme. Choose a dominant colour palette (two to three main colours) and select prints that share those tones, even if the art styles differ. Use consistent frame finishes, all black, all natural wood, or all mixed metals, to create cohesion. Alternatively, build around a unifying theme, such as Scottish-inspired prints mixed with abstract designs, or personal portraits paired with modern art. The key is intentional curation: every piece should feel like it belongs to the same story.
This article was written using GrandRanker