

Table of Contents
- Prepare Your Digital File Before Printing
- Select the Best Paper for Printing Digital Art
- Print Your Artwork at Home or Locally
- Find Affordable Picture Frames in the UK
- Master DIY Picture Framing Tips
- Choose Mounting Materials and Glazing
- Finish and Display Your Framed Print
- Frequently Asked Questions
Last Updated: August 31, 2026
Prepare Your Digital File Before Printing
Getting your digital file ready is the difference between a crisp print and one that looks blurry or pixelated. Most people skip this step and wonder why their artwork doesn't match what they saw on screen.
Check resolution and DPI requirements
Your digital file needs enough resolution to print without losing quality. The standard is 300 DPI (dots per inch) for prints viewed up close, though 150 DPI works for larger prints viewed from a distance (iso.org). Check your file's resolution in your image editing software by opening the file and looking for image properties or resolution settings.
If your file is lower than 150 DPI, enlarging it won't help, you'll only worsen pixelation. Stick with the original size or go smaller. A 300 DPI file at A4 size will print beautifully; a 150 DPI file at A2 size will still look sharp from across the room. For digital artwork from Thistle and Ink Art, all files are optimised for printing at standard dimensions, so you're starting with the right foundation.
Choose the right aspect ratio and standard dimensions
Standard dimensions fit into standard frames without cropping or awkward spacing. Common UK sizes include A4 (210 × 297 mm), A3 (297 × 420 mm), and A2 (420 × 594 mm). Before printing, check your file's aspect ratio, the relationship between width and height. If your artwork is square (1:1 ratio) but you force it into an A4 frame (which is taller), you'll either crop the image or add white space.
Adjust your digital file to match your chosen frame size using image editing software. Planning this step now prevents receiving a beautiful print that doesn't fit your frame properly.
Select the Best Paper for Printing Digital Art
Paper choice affects how your print looks, feels, and lasts. The wrong paper can make even beautiful digital artwork look cheap or fade within months.
Understand paper weight and finish options
Paper weight is measured in grams per square metre (gsm) (iso.org). Standard printer paper is around 80 gsm and feels thin. For framed artwork, aim for 200-300 gsm, which feels substantial and won't wrinkle when mounted.
Matte finishes hide fingerprints and reduce glare, making them ideal for home display. Glossy finishes are vibrant but show every fingerprint and reflect light. Satin finishes split the difference with a subtle sheen and work well for most digital art styles. For gothic or modern abstract designs, matte often works best. For vibrant, colourful artwork like Thistle and Ink Art specialises in, satin or light gloss can make colours pop without excessive shine.
Acid-free and archival quality considerations
Acid-free paper is essential if you want your print to last years without yellowing or deteriorating (peer-reviewed research). Regular paper contains acid that breaks down over time, especially when exposed to light and humidity. Archival quality paper is acid-free and made to withstand decades without fading.
The cost difference is minimal, usually just a few pence per sheet, but the longevity difference is huge. Look for paper labelled "acid-free" or "archival quality" when ordering. Most quality printing services offer this as a standard option.
Print Your Artwork at Home or Locally
Deciding where to print depends on your printer, budget, and timeline.
Home printing versus print-on-demand services
Home printing gives you complete control and instant results. If you have a decent inkjet printer, you can print high-quality artwork for the cost of ink and paper, often less than £2 per A4 print. The downside: inkjet inks fade faster than professional inks, and you're limited to your printer's maximum size.
Print-on-demand services and local print shops use professional-grade equipment and archival inks. Your print arrives ready to frame with superior quality. The trade-off is cost (typically £5-15 per A4 print) and waiting time (usually 3-7 days). For budget framing, home printing makes sense if you have a printer and need only a few prints. For larger sizes or archival quality without hassle, a local print shop offers better value.
Find Affordable Picture Frames in the UK
Frame costs can easily exceed print costs if you're not strategic. The good news: affordable picture frames are everywhere.
Ready-made frames versus custom framing
Ready-made frames come in standard sizes and cost £5-30 depending on material and finish. They're available from high street retailers, online marketplaces, and home décor shops. The advantage is instant availability and low cost; the disadvantage is limited colour and style options.
Custom framing means ordering a frame built to your exact specifications. It's expensive (often £50-150+ per frame) and slow. Unless you have an unusual size or specific design requirement, custom framing isn't worth it for budget projects. For most people, ready-made frames are the right choice. Look for simple wooden or metal frames in neutral colours that work with almost any artwork.
Repurposing thrifted and vintage frames
Charity shops and online marketplaces are full of frames at £1-5 each. Many are solid wood or metal and perfectly usable, even if the finish is dated.
A simple refresh transforms a thrifted frame. Light sanding and a coat of paint or stain takes 30 minutes and costs almost nothing. Before buying, check that the glass is intact, the frame isn't warped, and the back mechanism works. Measure the internal opening to ensure your print fits. Thrifted frames work brilliantly for gallery walls because you can mix and match styles with cohesive paint colours.
Master DIY Picture Framing Tips
Framing your own print saves labour costs and gives you complete control over the final look.
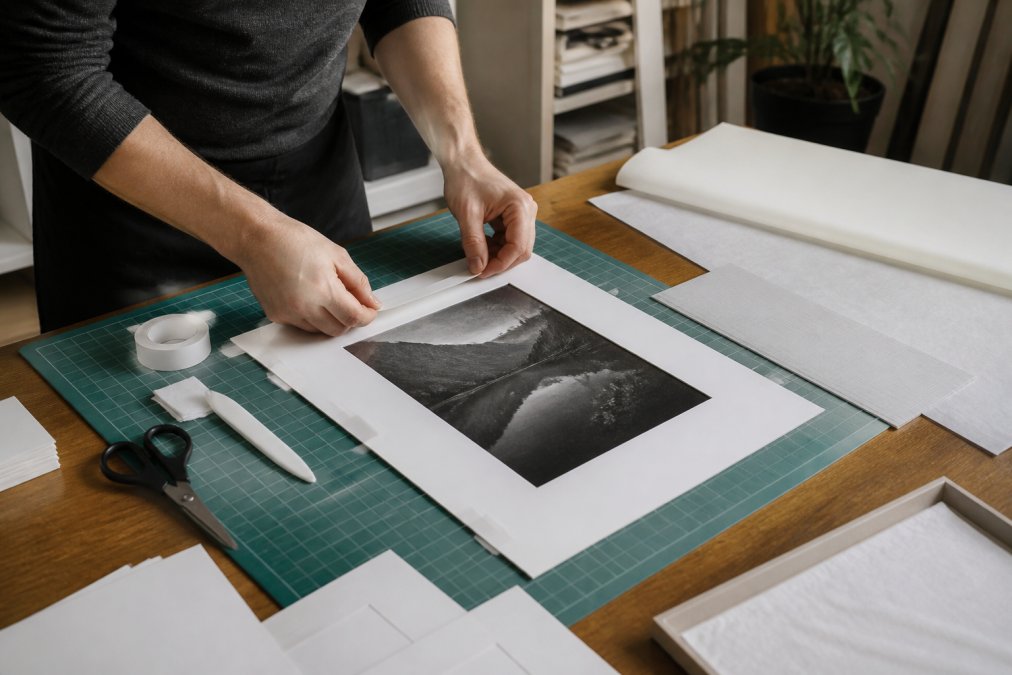
Dry mounting versus hinge mounting techniques
Dry mounting uses heat and pressure to permanently bond the print to backing board. It's fast and professional but permanent, you can't remove the print without damage. It requires expensive equipment.
Hinge mounting uses archival tape to attach the print to mat board at the top edge only. The print can be removed and repositioned without damage. For digital prints framed cheaply, hinge mounting is the practical choice. It's reversible, safer, and requires no special equipment.
Step-by-step assembly and mounting guide
Here's how to frame a digital print at home:
-
Gather materials: Your printed artwork, acid-free mat board or backing board, frame, archival tape, ruler, and a craft knife.
-
Cut your mat board to fit your frame's interior opening.
-
Position your print on the mat board and mark lightly in pencil.
-
Apply hinge tape to the top edge of the print's back side using small pieces (about 2-3 cm).
-
Attach the print to the mat board by pressing the hinge tape down firmly.
-
Insert into frame: Place the mat board with mounted print into the frame.
-
Add backing board and glass: Position glass first (clean it), then mat board with print, then backing board. Secure with frame's back clips.
-
Seal the back: Use brown tape to seal the back of the frame.
The whole process takes 20-30 minutes once you've gathered materials.
Choose Mounting Materials and Glazing
What sits between your print and the outside world matters more than most people realise.
Acid-free mat board and backing board
Mat board creates visual space around your print and protects it from touching the glass. Always choose acid-free mat board. Regular mat board contains lignin and acids that migrate into your print over years, causing yellowing and deterioration.
Acid-free mat board costs slightly more (usually an extra £1-3 per sheet) but lasts indefinitely. It's available in various colours and finishes. Backing board goes behind the print and should also be acid-free, typically conservation or museum board.
UV protection glazing on a budget
Standard glass lets ultraviolet light through, which fades artwork over time. UV-protective glazing blocks 99% of UV rays, keeping colours vibrant for years. It costs more than standard glass (usually £3-8 extra per frame), but if you care about your artwork, it's worth the investment. Acrylic glazing offers UV protection too and costs less, though it scratches more easily.
Finish and Display Your Framed Print
The final steps are assembly and installation.
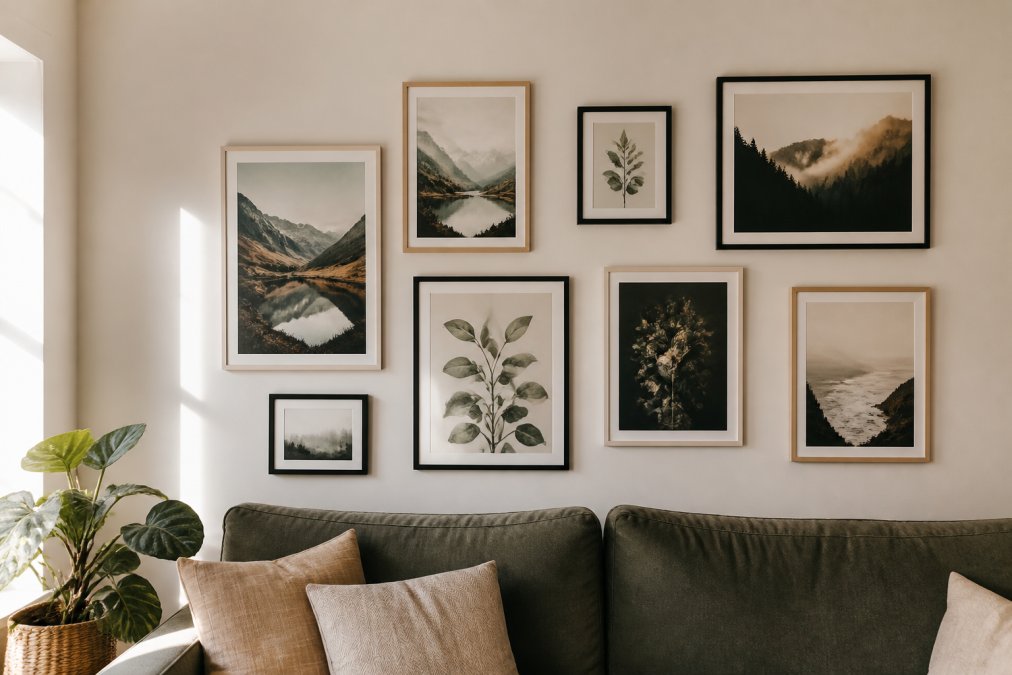
Frame hardware and dust cover installation
Frame hardware includes hanging wire, D-rings, or sawtooth hangers. Check that your frame comes with sturdy hardware rated for its weight. A dust cover (brown paper tape or kraft paper) seals the back, keeping dust and insects out while looking professional.
Before hanging, check that the frame is level and secure. Use appropriate wall anchors for your wall type. A spirit level works fine for ensuring frames are straight.
Creating a gallery wall with budget frames
Gallery walls are one of the best ways to display multiple affordable framed prints. Lay all your frames on the floor in your desired arrangement and take a photo. Measure distances between frame edges and note them.
Mix frame styles and sizes for visual interest, but keep them cohesive with colour or material. Start by hanging the centre frame, then work outward. Spacing between frames typically ranges from 5-10 cm.
A gallery wall of affordable framed digital prints from Thistle and Ink Art creates impact without expensive individual pieces. The variety of styles, personalised portraits, Scottish-inspired designs, modern abstracts, and gothic artwork, means you can tell a cohesive visual story across your wall.
Framing digital prints cheaply doesn't mean compromising on quality or aesthetics. The process is straightforward: prepare your file, choose quality paper and materials, print locally or at home, source affordable frames, and assemble using archival techniques.
Thistle and Ink Art's digital artwork is already optimised for printing at standard dimensions, so you start with a file ready to frame. Combine that with these budget-friendly methods, and you'll have professional-looking framed art on your walls in an afternoon.
Frequently Asked Questions
How do I know if my digital print will look good quality when framed?
Quality depends on file resolution (aim for 300 DPI minimum), paper choice, and print method. Before framing, print a test copy on standard paper to check colour accuracy and clarity. Use acid-free, archival-quality paper for longevity. If your digital file is from Thistle and Ink Art or a reputable source, it's designed for home printing. Check the file specifications before purchase to ensure it meets your frame size requirements.
What is the cheapest way to frame digital prints at home?
Buy ready-made frames from budget retailers or thrifted sources, print at home using affordable paper, and use dry mounting (adhesive spray or mounting tape) instead of professional hinge mounting. Skip expensive mat boards initially, or cut your own from acid-free card. This approach costs significantly less than custom framing while maintaining decent display quality. The key saving is doing assembly yourself rather than paying labour costs.
What is the best paper for printing digital art to make it look professional?
Use acid-free, archival-quality paper with a weight of at least 200 gsm for durability. Matte finishes hide fingerprints and work well for most art styles, while glossy finishes enhance colour vibrancy for photographs. Giclee-quality paper (fine art paper) offers the best appearance but costs more. For budget framing, standard matte cardstock works acceptably; upgrade to premium paper only for prints you plan to keep long-term or display prominently.
Can I use cheap frames from budget retailers and still make them look good?
Yes. Budget frames look professional when paired with quality mounting and thoughtful display. Use acid-free mat board to create visual interest, ensure your print is centred and straight, and add a dust cover to the back. Arrange multiple budget frames in a gallery wall layout to create impact. The frame's appearance matters less than clean assembly, proper spacing, and how the artwork itself is presented within it.
This article was written using GrandRanker